So, I've seen tutorials/pics for these in quite a few places and have been "collecting" embroidery hoops for my own set of them. I just pick them up at the thrifts store when I see them, usually for 30 cents up to 1.99. I finally had enough to get a good start and a few minutes to throw it all together.
Do you have fabric in your "stash" that you love but never gets made into anything...maybe you like it a bit too much? Or is that just me, ha. Here's what I put together, and I think I need to find some more itty bitty ones and one more big one to balance my wall out....we'll see.
Really, I didn't do a whole tutorial, more likes tips and tricks, cause all you need to do is google embroidery hoop wall art and you can have pages and pages of tutes, how to's, for sale and such.
This is my wall after I took all the pics off of it I had hanging and patched and painted...just excuse the mess on the back of the couch please {:o)
Those are all the pics I had on the wall that I moved to the stairwell, ha!
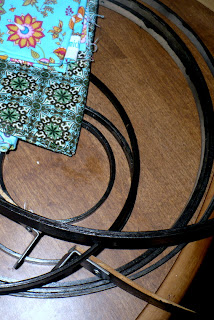
I missed taking pics of spray painting the outside hoops.... you can choose to leave the hoops alone, but I got them from the thrift store so the dark paint covered up marks and prices and such, and also made them all the same tone. Take the screws/bolts out of the tops and the inside hoops out before you spray paint them....
Those are the "insides" and the bolts and such. I missed the stretching of the fabric too, but it's pretty self explanatory....just stretch the fabric in between the outside and inside hoops and tighten the bolt and keep doing that till your fabric is taught and then trim the excess off around the backside
For some reason I couldn't get a decent pic of the whole wall...or at least one that showed some of the detail of the fabrics so I took two...one of the right half....
and one of the left....
I pushed the inside hoop beyond the outside edge, as shown in this pic cause it helped curve the excess around the back in toward the center of the hoop....plus I just like how it looks
I just hung the first one in the "middle" (over the biggest patch in the wall, ha) and then branched out with no rhyme or reason really, although I tried to keep the color scheme balances a bit.
Would be fun to get like 25 small ones and do a square grid of 5 rows of 5 in different fabrics!
Or get 4 big/small ones and 5 of the other size and alternate in a straight line vertically or horizontally...
Have you done this? If you have, or do, send me a link so I can come see!!!


What a nice way to use that beautiful fabric, as well as a great way to freshen up a rooms decor. I too love the differesnt fabric prints. Great post! Thanks~April
ReplyDeleteI love this!! My walls are so ugly and bare and we can't really paint since we are still renting. This is something that we can do to add some personality. Thanks!
ReplyDeleteHopping from hearmenurture.blogspot.com
What a neat idea - I had never heard of it before! You did a beautiful job. Shhh... I, too, have fabrics, papers, stickers, etc. that I like a little too much; sometimes it's hard to part with :> (found you through Raising Homemakers)
ReplyDeleteGreat, fun idea. And cheap too - yay! I think this would be great to do with vintage fabrics, too- and they could be changed seasonally -- super! {I have an etsy-shop, too,I sell vintage!}
ReplyDeleteVery cool :) visiting from 'me making do'
ReplyDeleteWell done. I love that these can be customized in so many different ways.
ReplyDelete