Friday, December 9, 2011

Color

Linking up with the Gypsy Mama, won't you join us?


Each week she has a five minute friday, gives a topic and then you just write whatever comes to mind, no editing, no worries about whether it sounds right...just write.


Here we go:

Color is what I love, from the brightest of blues to the warmest of yellows, the earthy browns to reds that span the spectrum of fire, cool greens to funky purples, from the light of white to the dark of black.
There is a color for every mood you have, no matter if your sad or happy, joyous or angry, or bubbling with excitement.  There's always a color that fits just perfectly.
I'm always amazed at how He created everything and that to study the colors he used can boggle anyone, as within each tone of color there are so many different shades and tonal differences.  Crazy to think that with the exception of black and white that every other color can be created from 3...red yellow and blue.  
Can you imagine life in black and white, I can't, I'm so grateful that He created such a wonderfully beautiful color palette and used them all in His creation.

Thursday, October 13, 2011

Awesome Idea for Making Your own Fabric!

This is so fun, you have to go check it out Here!


Monday, October 3, 2011

pattern for herringbone knitting, a cowl in particular

I was moseying around in blogland and found this awesome blog you have to come check out...

it has all sorts of patterns for making wonderful knit things, Here's the one I like!


Wednesday, September 7, 2011

Need to make fabric flowers?

Here's a fantastic list of links for 40 different kinds!  
Happy Sewing!

An easier way to silk screen (at home)

Hop over Here and check it out!  So going to do this soon!

Wednesday, August 3, 2011

Sharing: DIY Cabinet/Wall Decals

Hop on over Here and check these out then make some for yourself!


Friday, July 22, 2011

What are you Full of?

What comes to mind when you think of Full?  Do you see things as "the glass is half empty, or half full?"....

Looking over the last few months I realize that I am learning to live life day by day and truly appreciate every blessing down to the tiniest.  There's something about uncertainty that really can magnify things in your life.  Are you looking for the blessings and realizing how full your life is of truly magnificent wonder, or are you always looking for the next thing, wanting something new, craving something you feel is better than what you already have?  Culture seems to say that everything revolves around self and that you should never be "satisfied" with what you have, creating this atmosphere of unrest and unhappiness that will never be satisfied.  

I'm by no means perfect and don't do this as much as I should, but having a purposeful mindset to look and seek out the blessings and truly realize how full my life is with God's mercy and blessing really helps me in my daily journey.  It is an action, not just something to conjure up...something you ask God for help with, get a journal to write them down, talk with your friend and have someone there to remind you even when things don't seem great that there are still so many blessings to come as God can use any situation even the mucky ones.

What do you fill your life with....your mind with?  Are you choosing to be purposeful or are you just riding the wave as far as it will take you, with no thought about where you'll end up and missing out on all the little joys?  Are you choosing things that really truly make life full or empty hollow things that will never fill the void every one of us has?


This is part of Five Minute Friday, I'm linking up over at The Gypsy Mama

Make your own buttons!!!

These are really awesome, and if I ever get a minute and the supplies I'm totally doing this!
It would be a fun project for older kids too and then you can preserve their artwork too!


Hop over Here and check it out!

Friday, July 8, 2011

Five Minutes Of Grateful

Here's all the info over at The Gypsy Mama's page!  

This week is all about Grateful for Five Minutes....

Have you ever really thought about what you are truly grateful for? Really chewed on it and mulled it over for a bit?  


We tell our children all the time that they should be grateful for things...if they're not grateful then they might as well not have the thing.  Is gratefulness and attitude of the heart or an action word?
I really wish we as a society would learn to be grateful...how many times I've heard that we need a bigger house from "strangers" because we "only" have a 3 bedroom house and we've got 5 kids....we do just fine with what God's given us provided we have the right perspective.  Moving to a bigger house just makes more room for more "stuff" that needs taken care of and therefore uses time that we could be spending on much more important things like playing with our kiddo's, having people over, helping someone else or whatever God sets in our path.  

I've been pondering lately about how there's almost always a blessing to be grateful for in every situation, whether the situation is fantastic or really not too great.  If it's great you really don't have to look to hard, but the worse the situation is the harder you have to look but even if it's just that God's there with you holding you through the muck that is still a blessing.  The muck makes you ever more grateful for the better things that come as well.

I am so grateful for the blessing of a wonderful hubby and 5 littles, especially "bean" who is finally growing and smiling lots and doing so much better!

It's your turn, leave me a link so I can swing by your "place" for a visit! 

Wednesday, July 6, 2011

Embroidery Hoop Wall Art....Mini How To

So, I've seen tutorials/pics for these in quite a few places and have been "collecting" embroidery hoops for my own set of them.  I just pick them up at the thrifts store when I see them, usually for 30 cents up to 1.99.  I finally had enough to get a good start and a few minutes to throw it all together.  

Do you have fabric in your "stash" that you love but never gets made into anything...maybe you like it a bit too much?  Or is that just me, ha.  Here's what I put together, and I think I need to find some more itty bitty ones and one more big one to balance my wall out....we'll see.  

Really, I didn't do a whole tutorial, more likes tips and tricks, cause all you need to do is google embroidery hoop wall art and you can have pages and pages of tutes, how to's, for sale and such.


 This is my wall after I took all the pics off of it I had hanging and patched and painted...just excuse the mess on the back of the couch please {:o)

Those are all the pics I had on the wall that I moved to the stairwell, ha!


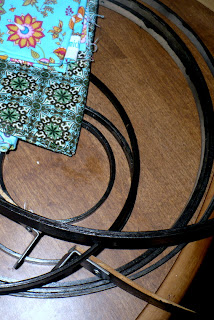
I missed taking pics of spray painting the outside hoops.... you can choose to leave the hoops alone, but I got them from the thrift store so the dark paint covered up marks and prices and such, and also made them all the same tone.  Take the screws/bolts out of the tops and the inside hoops out before you spray paint them....
Those are the "insides" and the bolts and such.  I missed the stretching of the fabric too, but it's pretty self explanatory....just stretch the fabric in between the outside and inside hoops and tighten the bolt and keep doing that till your fabric is taught  and then trim the excess off around the backside

For some reason I couldn't get a decent pic of the whole wall...or at least one that showed some of the detail of the fabrics so I took two...one of the right half....


and one of the left....

I pushed the inside hoop beyond the outside edge, as shown in this pic cause it helped curve the excess around the back in toward the center of the hoop....plus I just like how it looks


I just hung the first one in the "middle" (over the biggest patch in the wall, ha) and then branched out with no rhyme or reason really, although I tried to keep the color scheme balances a bit.

Would be fun to get like 25 small ones and do a square grid of  5 rows of 5 in different fabrics!

Or get 4 big/small ones and 5 of the other size and alternate in a straight line vertically or horizontally...

Have you done this?  If you have, or do, send me a link so I can come see!!!

Friday, July 1, 2011

You Are Welcome

Crazy to think the week has flown, seems like just yesterday I wrote about wonder...oh well, life's been crazy at our house for a while now and I'm just trying to go with the flow!  I do have pics of some tutorial type things taken I just have to find time to do the blog posts, hopefully I can get to them next week.  In the mean time I'm joining in again over on five minute friday and this weeks theme is Welcome.  

Hop on over Here and check out the rules and such and join in the fun!

Here we go:

I am always amazed to think of how God welcomes us all into His family whenever we decide we are ready.  He knit us together and formed us, had dreams and plans for us before we were ever created.  He loves each more than anyone could fathom and is with us ever step of every day walking along on our life journey, if we let Him. 

He cries with us and loves on us, He finds joy in us and give us wonderful blessings, He will always be there through thick and thin.  Even when we decide we don't "need" His help, He waits patiently ready to extend grace and mercy and Welcome us back into a loving relationship with Him.

Even in the middle of the muck when it doesn't "feel" like he's there, when you can't see His hand in whatever is going on, He says be still and know that I am still here, through all things I can bring glory, I love you and am with you even when you can't see to put one foot in front of the other I am here to guide you. 


Time's up...leave me a link to your five minutes so I can come visit!

Wednesday, June 29, 2011

Cool Idea.

Hop on over Here and check this out!


Monday, June 27, 2011

New Stuff in the Shop!

I had a small bit of time and there will be new stuff hitting the "shelves" this week starting today!

Come on over Here and check it out, then let me know what you think!


Friday, June 24, 2011

Wonder....Five minute Friday

Hop on over Here to get all the info about how to play along!

Here we go!

I am in awe of the many blessings You continue to pour out even in the midst of the muck we've dealt with lately.  Even when I don't know where to turn or if we'll ever figure out what's going on with Ari, whether she'll get better or whether she'll only have a short time here.  You show me daily the miracles all around me, and teach me how to appreciate the smallest of them.

I am so intrigued at how different each of our little's are, they have threads of being family woven through, but are truly each unique and individual.  Each bring something totally unique to our family dynamic.  I am filled with wonder watching their wonder at things too, loving their perspective and learning to look anew at things normally taken for granted.  

I am filled with wonder at the work You've done in my marriage, we are worlds away from where we were when we were first married and I am so grateful.  Helping each of us to grow closer to You and learn how to love the other more...helping us to "become one"...

I am amazed at how even when I take steps in faith and am so fearful You are there right beside me, leading me ever so gently and reminding me that You love me and my family more than I ever could.  Knowing You have everything under control and have a plan for each of us, even the smallest, is such a wonderful thing and I am so grateful that I can rest in that and know that in everything You can use it for your glory.


There, now it's your turn!  Leave me a link so I can come stop by too!

Tuesday, June 14, 2011

Simply Sharing: Book Strap Tutorial

Another to-do for my list!!!

Hop on over HERE and check out how to make this fabulous carrier!!!

Monday, May 23, 2011

"Stained" Glass Tutorial

So this is one of those things that kids can do or you can do, and the results will vary accordingly....might be a good teacher/bus driver end of the year gift, or you could make some to add a little extra to a graduation gift!


You'll need small bits of colored tissue paper, a glass vessel of some sort (vase, bowl, candleholder, glass ect) and glue/modpodge and a small paintbrush!


 put a small bit of glue in a dish and add some water and mix with your paintbrush, I eyeball it at a bout a one to one ratio
If you use mod podge you can add a bit of water or just use as is


The consistency should be kind of runny but not so much that it runs when you paint your glass object with it...work in sections and start applying your glue "glaze" to you glass item


You can either do like I did and just use strips/shapes that are smaller that your glass and over lap the lip of your glass, or you could also put the straight edges of your paper about a 1/4 inch below the rim of your glass like is shown in the other example down below on the bowl at the end of the tutorial

 Start laying tissue pieces and then layer another layer of your "glaze" and then keep alternating.  You could let one layer dry before adding another, or not....I don't get much time to "wait" around so I just kept layering till I like the look of it


 work your way around the glass and fold the pieces that go beyond under and over your piece...the top ones will get gently torn after you're all done


Here's the example I was talking about at the beginning where I started the tissue paper about a 1/4 inch below the rim of the bowl. 


You really can get into this as much as you want, even going as far as to do a landscape/picture type deal...someday when I have more "free" time I will play around with it
 When your glass is completely covered how you like, find something to rest it on while it dries


When it's dry, if you overlapped the rim of your glass, gently put a bit of your glaze on your finger and smooth down the edges after you have cut/torn the excess off....using an exacto knife would be good then you don't worry about haphazardly making the tissue pull in the wrong spot
 Put a tealight in it and your ready to roll...well if you did a candle holder that is

If you just use the glue mix as your glaze you could modpodge over the whole thing if you want to make a more finished exterior, or perhaps a coat of varnish would be easy enough.... although I just used the glue and water on the bowl with the squares and it's been my "junk" bowl for at least 4 years and has held up pretty well!

Hope you have fun trying this out, and if you get pics of your finished project, leave me a link so I can come see what your spin on it was!


Lastly, would anyone be interested in a tutorial for this sort of skirt I made for my girlie?  I know there are a lot of similar tutorials but if there is interest I will throw one together, just let me know!  It's got a flat front waistband and an elastic gathered back waistband and strips of fabric...


Wednesday, May 18, 2011

Sharing Rainy Day Fun

We've had a rainy day streak in our neck of the woods, but I just found this blog/tutorial and thought I'd share!

Hop over Here to see how it's done!

Sunday, May 15, 2011

Upcycled Toddler Dress How To


So, finally I've got a new tutorial for you, although I realized after I was done and going through the pics that some were too blurry and not worth including so hopefully I can explain those steps without the pics.  This is my first time doing something like this and having it turn out, and I apologize up front as I kind of fly by the seat of my pants when sewing and such and mostly don't pin or iron like I'm "supposed" to.... so if you like to pin and such you are more than welcome to, hopefully I don't drive you too nuts.  So here we go.  
I found this womens XL knit shirt at the thrift store and bought it for 2 dollars... I knew I could do something with it for our 4 year old that loves Mickey, she says "he's my favorite guy"


 Lay your shirt on a flat surface and match up the bottom hems as best as you can and smooth out the wrinkles in the shirt


match up the sides and top seams


Grab a tank top that fits your girlie and fold it in half and lay it on top of the way too big shirt


Cut out around the shirt leaving a bit extra to allow for seam allowances


 This is your new shirt now looking more like a dress....


turn it inside out and smooth and match hems again... and this would be one of those times where if you'd like you can pin the side seams in place ahem


Sew the side seams together with the right sides of the shirt touching


This is the setting on my machine for almost the widest zig zag stitch it will sew.... It's good to use a zig zag on knits so it will stretch a bit if you tug on the fabric, if you use a straight stitch it won't stretch at the seams and may lay funny
 Here's where there's a gap.... after the sides are done I decided I wanted to do a ruffle for the bottom hem.  I found some light weight cotton fabric and decided how wide I wanted the ruffle and cut the length roughly 2 times the length of the bottom of my dress.  Next time I will double the width as well and fold it in half so if you see under the ruffle it will be the same print instead of white underneath... I had to cut 2 pieces for my length, one for the front and one for the back, which was great cause since I don't pin I could just line the side seams up which I will show you later.....


So here's where I hemmed the bottom edge of my "ruffle"... either fold and press and fold again about 1/4 inch to encase all your raw edges, use pinking shears or forgo the hemming by doubling the width and folding in half which is what I will do next time.... 


I then lined up the other side seam of the ruffle and sewed it and now I have a loop of fabric
 At the top edge (not hemmed) sew the widest zig zag that your machine has but do not backstitch at the start and end and make sure you leave your thread tails pretty long.... we're doing a basting stitch to make the ruffle, and I'm sure there are videos and such on youtube or tutorials if you google it if this doesn't make sense... let me know if you need help and I will try to find a good one

once you have run the zig zag around the whole top of the ruffle, find one of the ends to hold on too and gently pull on it to ruffle the fabric.  I've found this works best (i.e. doesn't break the thread) if you use decent thread, or do at least 2 rows of zig zag stitch.  once you have the ruffle looking very ruffley start eyeballing it against the bottom hem of your shirt...


Once it looks close to the same length as the bottom of your shirt match the side seams up (and pin if you'd like) with the right side of the shirt and ruffle touching.


Space out the ruffles a bit so you don't have "clumps" and so they are spread out across the whole length of the bottom pretty evenly.... you could pin every couple of inches here as well....


since this is the bottom hem and I don't need to worry about the stretch factor I used a straight stitch and sewed right above the zig zag on the ruffle so you wouldn't see it... plus in order for the ruffle to stay you need to use a straight stitch so they don't all move to one spot

and I guess I assumed this but every time (except the gathering/basting stitch) you need to backstitch a couple of times to "lock" your stitches in place at the beginning and end of every "line" of sewing you do so your seams don't unravel... just wanted to clarify...


turned right side out

you could just leave it as is now or turn under and zig zag around the arm holes

but for some reason I felt compelled to add a bit of ruffle to the arm holes as well
 I cut out some pieces about 2 or 3 inches longer than the arm holes
 you need 2 pieces... and next time I will double the width and fold again so you only see the cute dots, not the funky underside of the fabric...


This time though I hemmed the edge, although if you do it this way either use pinking shears or press and fold and repeat with 1/4 inch seam to hid the raw edge...


here they are


hem the short ends together

and again I'm missing the step where you baste again... I did the whole unhemmed edge but next time I will just do the top part of the sleeve, then pull one string again to make the ruffle and eyeball it against your armhole in the shirt


match up your center under arm seam... and pin if you'd like with the right sides together

Using a straight stitch sew above your basting stitch again


Turn right side out and show your girlie


She wasn't too enthusiastic about modeling because she was trying to watch Dora, but she was thrilled with it and so excited... she's determined to wear it to school tomorrow as well.


The neckhole was a bit big so I ended up making a pin tuck in the back and sewing a ribbon to tie in a bow in the back... I think I will need to do on in the front as well so it doesn't dip so far down, but I will off center it to her right.  Here you can see why next time I will double the width of the ruffles so you don't see that icky white underside at all...

Here it is when I finally managed to get it off of her after she went for a bath...I think I will be making more of these for my other girlies, as it turned out fabulously and it will last for a while because it's knit so it will turn into a shirt when it's too short for a dress.  Try it out and leave me a link so I can come see please... and leave me some feedback as to what you think about this tutorial, was it easy to follow and clear enough?

I did get something else to do a tutorial with at the thrift store as well, just have to find the time to do it and take pics...this time it's something for your home, and more of a crafty thing, no sewing involved!